How 3D Printing, Scanning, and Engineering Work Together to Optimize Product Design | Rev 3D Services in Connecticut

November 28, 2024


How 3D Printing, Scanning, and Engineering Work Together to Optimize Product Design

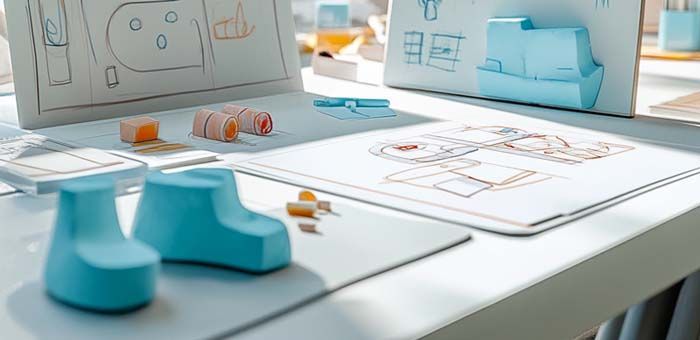
In today’s fast-paced product development environment, businesses are increasingly turning to advanced technologies to streamline design processes, reduce costs, and enhance product quality. One powerful combination of tools—3D printing, 3D scanning, and engineering—works synergistically to accelerate product development and optimize design. In this article, we’ll delve into how these technologies complement each other, creating a seamless workflow that brings products from concept to market faster and more efficiently.


1. 3D Scanning: Capturing the Physical World

The journey of product design often begins with a physical object or prototype, and this is where 3D scanning plays a critical role. By using high-precision laser or structured light scanning technologies, engineers can quickly capture the exact dimensions and geometries of existing parts or prototypes. This digitization of the physical object allows for detailed analysis and modification without needing to manually measure or recreate the part.

3D scanning is particularly valuable in reverse engineering, where a physical part needs to be reproduced or improved. Whether you’re looking to recreate a legacy part, improve a design, or adapt an existing component for a new application, scanning provides an accurate digital blueprint. This data can then be fed directly into CAD (computer-aided design) software, facilitating an easy transition from the physical to the digital realm.


2. 3D Printing: Bringing Designs to Life

Once the initial designs have been scanned or conceptualized, 3D printing comes into play. Additive manufacturing (3D printing) allows designers to rapidly create prototypes or even final products directly from digital models. This flexibility speeds up iteration cycles and allows for real-time modifications and testing.

For product design, 3D printing is particularly useful in producing complex geometries and structures that would be impossible or prohibitively expensive with traditional manufacturing methods. Designers can experiment with lightweight, intricate, or organic shapes without the limitations of conventional tools. In addition, 3D printing allows for the production of small batches or custom products, making it a versatile solution for both prototyping and low-volume manufacturing.

The iterative process enabled by 3D printing is one of its greatest strengths. Designers can test the fit, function, and form of a product early in the design phase, receiving real-world feedback that can be used to refine the design. This “fail fast” approach ultimately leads to better products and faster development times.


3. Engineering: The Backbone of Optimization

While 3D scanning and printing provide the tools for rapid iteration and prototyping, it’s engineering that ensures the product will meet performance standards, durability requirements, and manufacturing constraints. Mechanical engineers take the digital models produced through 3D scanning and printing and apply rigorous simulations, testing, and optimization techniques to ensure the final design performs as expected.

Through techniques like finite element analysis (FEA) and computational fluid dynamics (CFD), engineers can simulate how a product will behave under real-world conditions. These analyses help identify weak points in the design, suggest material changes, or recommend structural adjustments to improve performance. Engineering also plays a key role in ensuring that designs are manufacturable at scale, whether using 3D printing or more traditional manufacturing methods.

In many cases, engineers also collaborate with industrial designers to ensure that the product not only functions well but also appeals to the end user. By combining technical expertise with design sensibility, engineers optimize products for both usability and manufacturability.


The Synergy Between 3D Scanning, Printing, and Engineering

The real power of 3D scanning, printing, and engineering lies in how these technologies work together to create a streamlined product development process. 3D scanning provides the foundation by converting physical objects into precise digital models. Once the digital model is ready, 3D printing enables rapid prototyping and iteration, allowing designers to quickly test ideas and make changes. Finally, engineering ensures that the product will perform optimally by applying simulations and analyses, addressing potential issues before the product is finalized for production.

This synergy allows for shorter development cycles, reduced costs, and higher-quality products. By seamlessly moving between physical and digital realms, businesses can ensure that their products meet both functional and aesthetic goals while remaining within budget and production timelines.


Conclusion

The integration of 3D scanning, 3D printing, and engineering has fundamentally changed how products are designed and developed. By leveraging the strengths of each technology, product designers and engineers can optimize designs, reduce time-to-market, and bring innovative products to life. Whether you're developing a new product from scratch, improving an existing one, or customizing a solution for a specific client, the combined power of these tools offers unmatched flexibility and efficiency in today’s competitive marketplace.


You might also like
February 20, 2025
The Power of 3D Printing in Creating Fixtures for Machining and Manufacturing The world of machining and manufacturing has seen transformative technological advancements over the past few decades, and one of the most impactful innovations is 3D printing. This versatile process has revolutionized industries across the board, offering increased efficiency, flexibility, and cost-effectiveness. One area where 3D printing has truly demonstrated its potential is in the creation of fixtures used in machining and manufacturing. What are Fixtures in Machining and Manufacturing? Fixtures are specialized tools or devices used to hold and support a workpiece in place while machining operations are being performed. They ensure the workpiece is positioned correctly, securely, and consistently, which is crucial for achieving precise results. Whether it’s in milling, drilling, grinding, or turning, fixtures provide the stability and repeatability needed for high-quality production. Fixtures are typically made from materials like metal or hardened steel due to the need for durability and strength. However, the traditional process of designing and creating these fixtures can be time-consuming and expensive. This is where 3D printing comes into play, offering a host of benefits that streamline the production process. The Advantages of 3D Printing for Fixtures 1. Rapid Prototyping and Design Flexibility Traditional fixture manufacturing involves designing the fixture, creating detailed drawings, and sending them to a machine shop for fabrication. This process can take weeks or even months, depending on the complexity of the fixture. In contrast, 3D printing offers rapid prototyping capabilities, allowing engineers to quickly design and produce fixtures in a matter of hours. This rapid turnaround is particularly beneficial in the early stages of production, where multiple iterations and adjustments may be required. 3D printing allows manufacturers to create and test different fixture designs, speeding up the overall development cycle and reducing time to market. 2. Cost-Effectiveness The cost of manufacturing traditional fixtures can be high, especially when complex geometries are involved. Machining these parts requires specialized tools and significant labor, which can drive up the cost. With 3D printing, however, the need for expensive tooling is eliminated. The digital nature of 3D printing means that fixtures can be produced directly from CAD files, without the need for additional setup or machine time. For low-volume runs or custom designs, 3D printing becomes an incredibly cost-effective option. 3. Customization and Complexity 3D printing opens up new possibilities in terms of fixture design complexity. Traditional manufacturing methods often struggle with intricate or non-standard geometries. However, 3D printing is ideal for producing complex shapes that would be nearly impossible or prohibitively expensive to machine. Manufacturers can create fixtures with internal channels, lattice structures, or unique contours that precisely fit the shape and needs of a particular workpiece. Customization becomes effortless, and this flexibility allows for tailored solutions that improve the overall manufacturing process. 4. Lightweight and Strong Materials With the development of advanced 3D printing materials, it’s possible to create fixtures that are both lightweight and strong enough to handle the demands of machining. Materials like high-strength plastics, carbon fiber composites, and even metal powders used in 3D printing ensure that the final fixtures can withstand heavy loads while reducing the overall weight. This is particularly advantageous in industries where fixture weight is a critical factor, such as aerospace or automotive manufacturing. Lighter fixtures also contribute to faster machine cycles, enhancing overall efficiency. 5. Reduced Lead Times and Increased Efficiency Lead time is one of the most significant challenges in traditional fixture manufacturing. From design to fabrication, the entire process can take days or even weeks. This delay can have a cascading effect on production schedules and overall factory efficiency. By contrast, 3D printing dramatically reduces lead times. Fixtures can be designed, optimized, and printed in a fraction of the time, allowing manufacturers to quickly adapt to changing production demands. In industries with tight deadlines or high-mix, low-volume production, the ability to produce fixtures quickly gives manufacturers a competitive edge. 6. Low-Volume Production and On-Demand Manufacturing One of the most compelling reasons to use 3D printing for fixtures is the ability to produce low-volume runs without the need for expensive tooling or molds. Traditional fixture production often requires significant upfront investment for high-volume runs, which may not be cost-effective for small batch sizes. 3D printing allows manufacturers to produce fixtures on-demand and in small quantities, which is ideal for industries where the need for specialized or custom fixtures is infrequent. This on-demand capability reduces waste and optimizes resource allocation. 7. Reduced Waste and Sustainability Traditional machining methods often generate significant amounts of material waste due to the subtractive nature of the process. With 3D printing, material is only added where needed, minimizing waste and reducing the environmental impact. Additionally, many 3D printing materials are recyclable, contributing to a more sustainable production process. As industries continue to prioritize sustainability, 3D printing offers an eco-friendly alternative to traditional manufacturing methods. Real-World Applications of 3D Printed Fixtures The benefits of 3D printing for fixtures are already being realized in various industries: Aerospace : Aerospace companies use 3D printed fixtures to hold complex components in place during assembly, reducing weight and improving precision. Lightweight, durable fixtures are essential in this highly demanding industry. Automotive : In automotive manufacturing, 3D printed fixtures are used for custom parts that require precise alignment during machining. The ability to produce low-volume, highly specialized fixtures at a lower cost has a significant impact on overall production efficiency. Medical : In medical device manufacturing, custom fixtures are necessary to handle delicate and intricate parts. 3D printing allows for the rapid production of these custom tools, ensuring both precision and cost savings. Tooling and Prototyping : Industries focused on prototyping benefit from 3D printed fixtures to secure prototype parts in place for testing and analysis. The ability to quickly create multiple fixture variations speeds up the overall prototyping process. Conclusion  3D printing has emerged as a game-changer in the world of machining and manufacturing, particularly when it comes to the creation of fixtures. With its ability to offer rapid prototyping, cost-effective production, customization, and sustainability, 3D printing is reshaping how manufacturers approach fixture design and production. As industries continue to embrace this technology, the future of manufacturing will undoubtedly be more flexible, efficient, and cost-effective, with 3D printing playing a pivotal role in shaping the way fixtures are created and used. By integrating 3D printing into their operations, manufacturers can unlock new levels of productivity, reduce costs, and enhance their overall ability to innovate.
February 19, 2025
How Rev3D Services Can Help You Develop Your Idea into a Manufactured Product Turning a brilliant idea into a tangible product can be an exciting yet overwhelming process. Whether you're an entrepreneur with a new invention or a business looking to innovate, having the right support to guide you from concept to manufactured product is essential. At Rev3D, we specialize in helping you transform your idea into a fully realized, market-ready product with expert product development and manufacturing services. In this blog, we’ll walk you through how Rev3D’s services can help you take your idea from inception to production, ensuring that it not only looks great but functions flawlessly. 1. Initial Consultation and Idea Refinement Every great product starts with a spark of inspiration, but that spark needs to be refined into a clear, viable concept. At Rev3D, we begin by sitting down with you to discuss your idea, your goals, and your vision for the product. We help you clarify your concept and ensure that it is well-defined, so we can start working on the details that will make it a reality. Understanding Your Needs: Whether it’s a new product design, a functional improvement, or a full innovation, we listen carefully to understand your exact requirements and how we can best serve you. Feasibility Assessment: We help you assess the technical feasibility of your idea, ensuring that it’s realistic and practical to produce. This stage is crucial to identifying any early challenges or opportunities. By refining your concept early on, we ensure that we are aligned in every step of the development process, reducing any risks as we move forward. 2. Design and Prototyping: Bringing Your Idea to Life With a clear idea in mind, the next step is to create a design that works. Our design team at Rev3D is skilled in turning abstract concepts into detailed 3D models, drawings, and prototypes that allow you to see and interact with your product before manufacturing even begins. 3D Modeling: Using advanced CAD software, we create detailed 3D models of your product, ensuring that it looks, functions, and feels just as you envisioned. Prototyping: We then move on to rapid prototyping, creating physical models or functional prototypes using 3D printing, CNC machining, or other methods, depending on your product’s material and complexity. Prototyping is a key phase that allows you to evaluate the design, identify any design flaws, and make adjustments before production begins. It’s a critical opportunity to refine your product and ensure it meets your expectations. 3. Engineering and Development: Ensuring Functionality and Feasibility Designing a product is one thing, but ensuring that it works as intended is where Rev3D truly excels. We provide comprehensive engineering and development services that ensure your product isn’t just well-designed—it’s engineered for performance, durability, and manufacturability. Engineering Optimization: Our engineering team looks at the design from a technical perspective, making sure that it can be manufactured efficiently and meets all necessary standards. Material Selection: We guide you through the process of selecting the right materials for your product, balancing cost, durability, and functionality to ensure that it performs as intended. Design for Manufacturability (DFM): We make sure that your design is not only functional but also optimized for mass production. This includes simplifying complex features, reducing material waste, and ensuring that your product can be assembled with minimal labor. With our engineering expertise, we ensure that your product isn’t just a concept—it’s a fully functional and manufacturable product. 4. Manufacturing: From Prototype to Production Once the design and engineering are complete, the next step is to bring your product to life on a larger scale. At Rev3D, we provide end-to-end manufacturing solutions to ensure your product is produced efficiently, consistently, and to the highest quality standards. Manufacturing Setup: Whether you need low-volume production or large-scale manufacturing, we help set up the production process, including sourcing materials and selecting the best manufacturing methods (e.g., injection molding, CNC machining, or additive manufacturing). Production Run: We oversee the entire manufacturing process, ensuring everything runs smoothly from the initial production run to the final product. Our team works closely with manufacturers to monitor quality, timelines, and costs. Quality Control: Quality assurance is a top priority at Rev3D. We implement rigorous testing protocols to ensure that your product meets all performance, safety, and regulatory standards before it goes to market. With our expertise, your idea will seamlessly transition from a prototype to a high-quality, mass-produced product ready for the market. Why Choose Rev3D? Rev3D is more than just a product development company—we’re your trusted partner in turning your idea into a successful, manufactured product. Here’s why working with us makes all the difference: End-to-End Expertise: From concept to delivery, we handle every stage of the product development and manufacturing process, ensuring a seamless transition at every step. Customization: We tailor our services to meet the specific needs of your product, offering flexible solutions that align with your goals and timeline. Quality and Precision: Our attention to detail and commitment to quality ensure that your product meets the highest standards in design, performance, and durability. Conclusion: Let Rev3D Help You Turn Your Idea Into a Reality At Rev3D, we’re dedicated to helping you transform your ideas into real, market-ready products. Whether you’re at the initial concept stage or ready to scale up production, our team of experts will guide you through every step of the process—from design and prototyping to manufacturing and logistics.  If you’re ready to take your idea to the next level, contact Rev3D today. Let’s bring your vision to life and create a product that stands out in the marketplace!
December 13, 2024
Creating a new product is an exciting but complex journey. From initial idea to market launch, product development involves a series of stages that ensure a smooth transition from concept to customer. Understanding each stage is essential whether you're an entrepreneur, a startup, or part of an established company looking to innovate. In this blog, we'll break down the stages of product development into clear, actionable steps to help you navigate the entire process. 1. Idea Generation & Discovery Every product starts with a spark—an idea. The first stage of product development is all about identifying opportunities, solving problems, or discovering unmet market needs. Key Activities: Brainstorming: Gather your team or stakeholders to generate creative and innovative ideas. Identifying Market Needs: Look for gaps in the market or consumer pain points that your product could address. Research Competitors: Understand what competitors are offering and identify ways to improve or differentiate your solution. Customer Feedback: Reach out to potential customers to understand their needs and preferences. Questions to Ask: What problem does this product solve? Who will benefit from this product? What makes this idea unique or better than competitors? 2. Idea Screening & Feasibility Analysis Not every idea will make it through the development process. The next stage involves screening your ideas for feasibility, potential, and alignment with your goals. Key Activities: Screening Ideas: Prioritize ideas based on their market potential, cost, risk, and alignment with your company goals. Technical Feasibility Analysis: Assess whether your idea can be developed with the available technology or expertise. Financial Feasibility: Estimate costs, return on investment (ROI), and determine if the product is financially viable. Market Research: Analyze trends, customer needs, and demand to verify market opportunities. Questions to Ask: Can we realistically build this product? Does this idea align with our target market and mission? How much will this cost, and can we expect a profitable return? 3. Concept Development & Design Once you've screened your idea and confirmed feasibility, it's time to flesh it out. The concept development stage focuses on creating detailed plans and defining the design and features of your product. Key Activities: Define Product Features: Determine what the product will include and how it will solve the identified problem. Design & Prototyping: Create sketches, models, and digital representations to visualize the product's functionality. User Experience (UX) Design: Ensure the design is intuitive, functional, and meets customer needs. Technical Planning: Establish technical requirements and select tools or technology necessary for development. Tools Commonly Used: CAD Software (e.g., AutoCAD, SolidWorks) Wireframing Tools (e.g., Figma, Adobe XD) Prototyping Tools (e.g., 3D printing, mock-ups) 4. Prototype Development & Testing With a concept in mind, the next stage is to create a prototype —a working model of your product. Prototyping allows you to evaluate your design, functionality, and user experience before investing heavily in production. Key Activities: Build the Prototype: Create a physical or digital prototype that represents your idea. Test Functionality: Ensure the prototype works as intended and solves the customer problem. User Testing: Allow real users to interact with your prototype to gather feedback. Iterate & Refine: Based on testing feedback, refine the design and functionality. Why Prototyping is Crucial: Detect design flaws or functional issues early. Save time and costs by addressing problems during testing rather than during full-scale production. Improve user experience by incorporating real customer feedback. 5. Product Development & Manufacturing After the prototype has been thoroughly tested and adjusted, the next step is scaling production. This stage is about transitioning from testing to mass production while maintaining quality standards. Key Activities: Design for Manufacturing (DFM): Adapt designs to ensure they are easy and cost-effective to manufacture. Select a Production Method: Choose between in-house production or outsourcing to a manufacturer. Sourcing Materials: Identify suppliers, negotiate contracts, and ensure the timely delivery of necessary materials. Setup Production Lines: Establish assembly processes, quality checks, and timelines for large-scale production. 6. Market Testing & Validation Before fully launching your product, it's important to test its reception in the market. Market testing allows you to gather insights and data about how well your product will perform with your target audience. Key Activities: Pilot Testing: Test the product with a smaller group of customers or target markets. Beta Programs: Offer limited access to early adopters for feedback. Gather Feedback: Identify any issues, customer preferences, or additional features to consider. Adjustments: Based on feedback, fine-tune the product or marketing strategy. Why Market Testing Matters: Avoid costly mistakes by identifying potential product flaws or misalignment with customer needs. Build confidence by demonstrating customer demand and feedback. 7. Product Launch & Commercialization After successful testing and development, you're ready to introduce your product to the market. This stage involves marketing, promotion, distribution, and ensuring that consumers can access and use your product. Key Activities: Develop a Go-to-Market Strategy: Plan how you'll introduce your product to customers. Create a Marketing Plan: Establish promotional strategies using digital ads, social media, PR campaigns, content marketing, and partnerships. Distribute the Product: Choose effective distribution channels—retail, e-commerce, or direct-to-consumer options. Customer Support & Feedback: Set up post-launch support and monitor customer feedback for future updates. 8. Post-Launch Review & Maintenance Even after your product is launched, your work isn't over. This final stage involves monitoring performance, gathering customer feedback, and addressing any issues post-launch. Key Activities: Track Sales & Performance Metrics: Monitor KPIs like customer adoption rates, churn rates, and reviews. Customer Support: Ensure customer satisfaction by resolving complaints, issues, or concerns. Iterate on the Product: Improve the product based on data and feedback to address market needs over time. Plan for Updates: Introduce updates, new features, or improvements to keep customers engaged. Final Thoughts: Product Development is an Ongoing Journey Product development isn’t just about creating and launching one product. It's a cycle of ideation, design, testing, feedback, and innovation. Once you launch, the goal should be to continually improve and adapt based on market changes and consumer needs. By understanding these stages of product development, you position yourself for a smoother, more strategic journey—reducing risks, optimizing resources, and increasing your product's chances of success. Now that you know the steps, are you ready to bring your product idea to life? The first step is to start with clarity, research, and a plan. Good luck! 🚀
More Posts

Book a Service Today

Share by: